Click here to purchase Table Rate Shipping
Minimum Requirements
Table Rate Shipping requires WooCommerce 3.0.0+ and one of the following compatible marketplace plugins:
- WC Vendors 1.9.14+
- WC Vendors Pro 1.4.0+
- Dokan Lite 3.0.0+
- Dokan Pro 3.0.0+
Installing Table Rate Shipping
To install Table Rate Shipping:
- Log into your WordPress site.
- Go to Plugins > Add New.
- At the top of the screen, click Upload Plugin.
- Select the .ZIP file sent to you in your Purchase Confirmation email. You have two options:
- Click Browse. Find and select the plugin .ZIP file.
- Drag and drop the .ZIP file onto the Upload Plugin screen.*
- Click Install Now.
- When the installation completes, click Activate.
* Drag and drop will only work if your browser supports it!
Activating Your License
In order to benefit from the latest updates to Table Rate Shipping, you need to activate your license key. To do so:
- Log into your WordPress site.
- Go to Plugins.
- Find the row for WCV Table Rate Shipping.
- Click activate license.
- Enter your license key, which was delivered along with your download.
- Click Activate.

That’s it! Table Rate Shipping is now installed and ready to be configured.
Admin Settings
Once Table Rate Shipping is installed and activated, you can access the plugin settings one of two ways:
- On the Plugins screen, find WCV Table Rate Shipping and click on the Settings link.
- Go to WooCommerce > Settings > Shipping > Table Rate Shipping.
No matter how you access the settings page, these will be your options:
Enable/disable
By clicking this box, you will enable this as a shipping solution within your marketplace.
Tax Status
Set the tax status to Taxable if you want taxes to be collected on the shipping cost. Otherwise, set it to None.
Include Tax
When this box is checked, shipping costs will be calculated after taxes are applied. This setting is important when calculating shipping based on the subtotal price of the items in the customer’s cart. If this is checked, the price of any applicable tax will be included when determining the amount of shipping.
Exclude Discount
When this box is checked, shipping costs will be calculated before any discounts are applied. This setting is important when calculating shipping based on the subtotal price of the items in the customer’s cart. If this is checked, any discounts will be applied to the subtotal before the shipping price is calculated.
Display Options
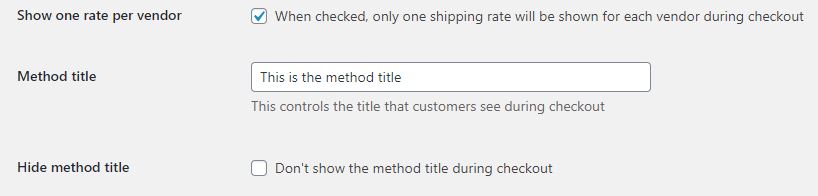
Show One Rate Per Vendor
When this box is checked, only the first matching shipping rate will be displayed for each vendor on the cart and checkout pages. This was the default behavior prior to Table Rate Shipping v2.1. For new installs of Table Rate Shipping, v2.1+, the default plugin behavior is for this option to be disabled.
To illustrate, consider a vendor with the following shipping setup:
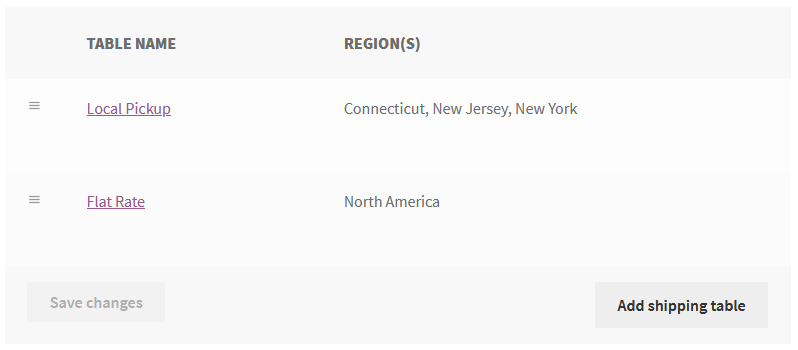
With “Show One Rate Per Vendor” unchecked, a customer in New Jersey would see two shipping options available for selection at checkout – Local Pickup and Flat Rate. With it checked, that same customer would only see the Local Pickup option.
Method Title
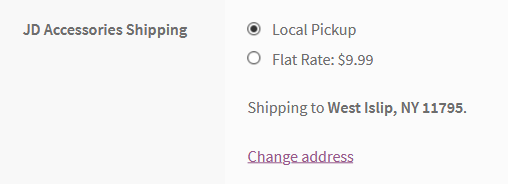
By default, the table title entered by the vendor is used as the label for the corresponding shipping method on the checkout page. For example, the table setup depicted in the screenshot above would translate to this on the cart and checkout pages:
When “Show One Rate Per Vendor” is enabled, we instead use the title you enter within the “Method Title” text box in the admin settings to describe the shipping charge in your customer’s cart. Generally, you would enter “Shipping” or “Shipping Fee” in this section. This feature has a toggle, which allows this display to be hidden as well.
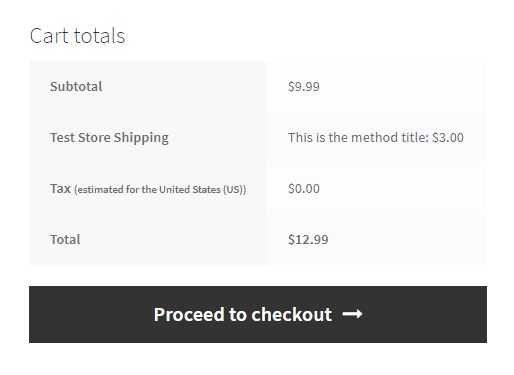
And this is how the Method Title displays within a customers cart:
This setting is maintained for backwards compatibility with TRS 2.0.4 and earlier, where the default behavior was to show one shipping rate per vendor with the Method Title as the label.
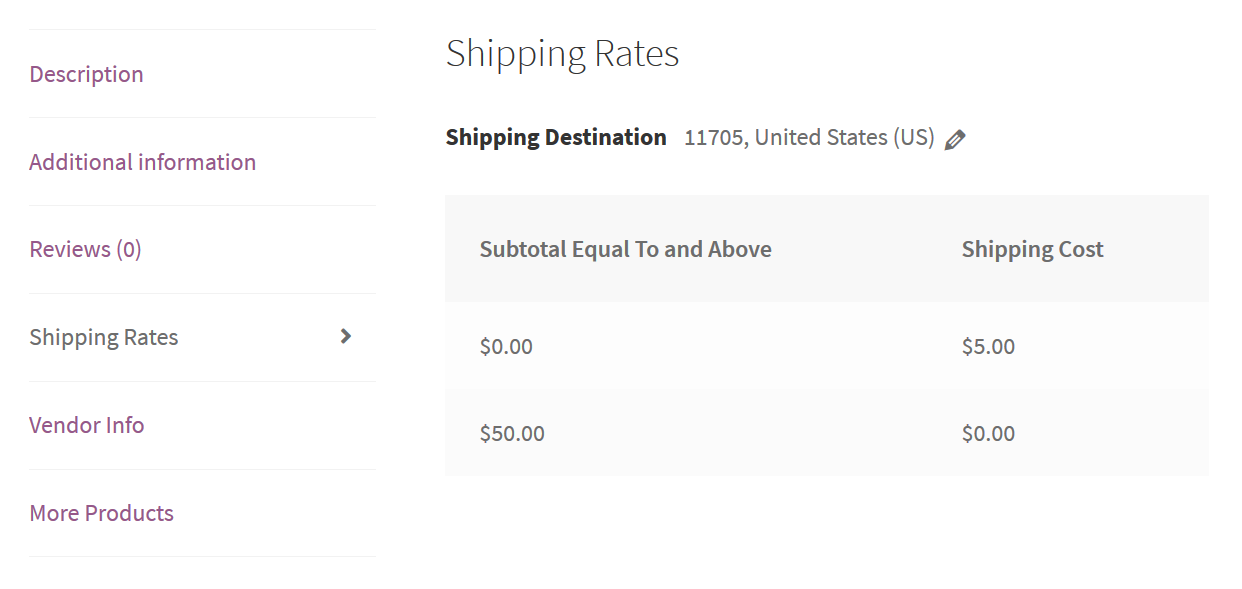
Show Shipping Rates Tab
Display shipping rates on the front end product page via the the “Show a ‘Shipping Rates’ tab on product pages” toggle. When enabled, the vendor’s shipping tables will appear under a new tab called “Shipping Rates.” Customers will have the ability to select the destination the item will be shipped to and the applicable vendor tables will be displayed. If the item does not ship to the selected destination, a message alerting the customer will appear.
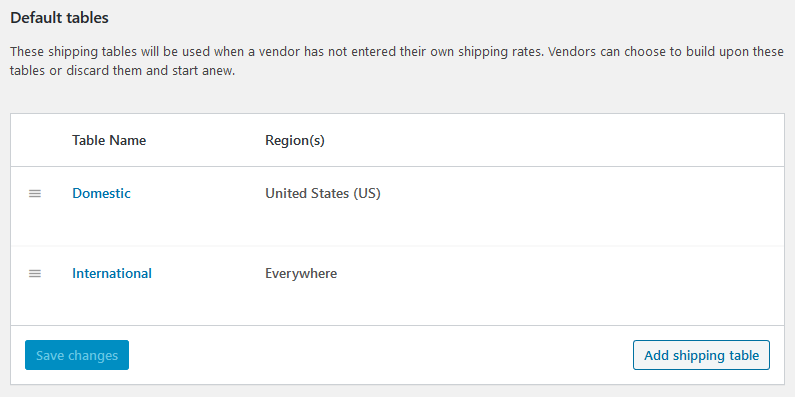
Default Tables
Starting with Table Rate Shipping 1.2.0, you can set up Default tables. These tables are used as a fallback when a vendor has not configured their own, and as templates to help new vendors set up their tables.
When Table Rate Shipping is installed for the first time, two tables are generated automatically:
- Domestic – This table applies to shipping addresses in your shop’s base country.
- International – This table applies to shipping addresses outside of your shop’s base country.
You can – and should – delete or edit these tables based on your need. Read on for more information.
Viewing Tables
Each vendor can configure zero or more shipping tables. The tables for an individual vendor can managed from the Shipping Tables screen.
How this screen is accessed depends on whether you are a vendor or admin:
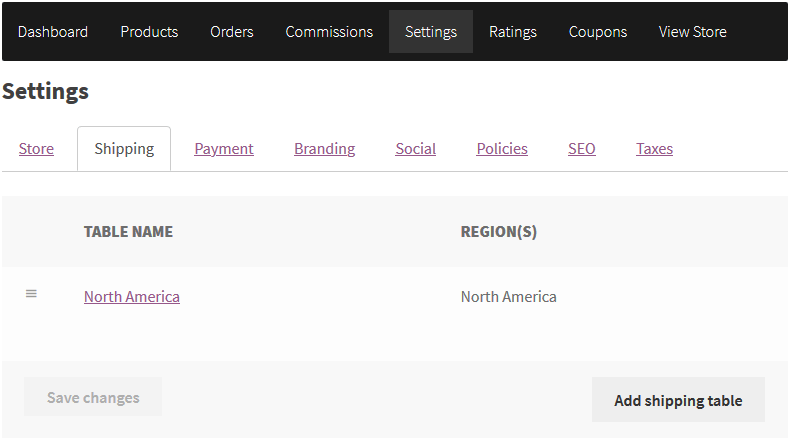
Vendors
If you’re a vendor, you can manage your own tables as follows:
If the marketplace is using WC Vendors…
- Go to the Vendor Dashboard
- Click Settings > Shipping (WC Vendors Pro) or Shipping Settings (Free)
If the marketplace is using Dokan…
- Go to the Vendor Dashboard
- Click Settings > Shipping
Admins
If you’re an admin, you can manage a vendor’s tables as follows:
- Go to Users in the WordPress dashboard.
- Mouse over the vendor whose tables you wish to view/edit.
- Click Edit Tables.
Adding Tables
Adding a new shipping table is easy! At a high level the process looks like this:
- Go to the Shipping Tables screen.
- Click Add shipping table.
- Fill out the Table Name and other basic details.
- Add one or more Shipping Rates for the table.
- Click Save Changes.
Configuring Basic Options
Every shipping table has some basic options that appear under the Table Options section in the shipping table modal. These options are documented below.
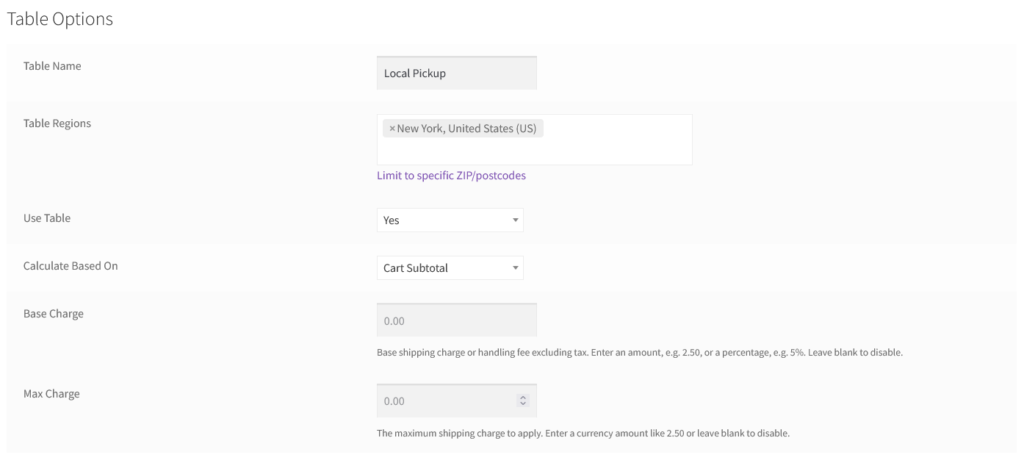
Table Name
This is your name for the shipping table. It is used as the label for the shipping charge on the cart and checkout pages, so you should choose your table’s name carefully. Examples include “Local Pickup” and “Flat Rate”.
Table Regions
This is where you can select the continents, countries, and states the rates in the table apply to. Click “Limit to specific ZIP/postcodes” to reveal a field where you can input specific ZIP/postcodes for the table.
Table Postcodes
This field appears when you click “Limit to specific ZIP/postcodes” and allows you enter postcodes where the rates in the table apply. Postcodes with wildcards (e.g. CB23*) and numeric ranges like 11000…11999 are supported in addition to specific postcodes like 90210.
Use Table
Selecting “Yes” means you will offer the shipping rates configured for this table, to the locations defined in this table. Selecting “No” means the table will be excluded from the scan for consumer matched criteria, without having to delete the table in cases where you change your shipping strategy. Keeping the table as defined intact for use at a later time.
Calculate Based On
You are able to collect shipping charges based on a tiered system and by using one of three different criteria. You can charge shipping based on:
- Cart Subtotal – The dollar amount of your products a customer has in their shopping cart at checkout.
- Number of Items – The total number of your items a customer has in their cart at checkout.
- Total Weight of Items – The total weight (in the store’s weight units) of your items a customer has in their cart at checkout.
Max Package Weight
When using weight based shipping, the Max Package Weight setting allows you to set the maximum weight per customer shipment. When a customer’s cart includes items that exceed the weight entered here, the overage will be treated as a separate shipment and an additional shipping charge will be added to the customer’s shipping total. If necessary this process will be repeated until all items are accounted for.
Calculation Method
When using item based shipping, the Calculation Method determines how shipping is calculated based on the number of items in the cart. The options are:
- Apply rate once per shipment (default) – Select this option to define table rates based on the number of items in the cart. The table rate that gets matched will be applied to the order just as with weight based or subtotal based shipping.
- Apply rate once per item – Select this option to define a base charge for the first item plus an additional charge for each additional item in the cart. When selected the Table Rates section will be hidden and a new Additional Charge Per Item field will appear.
Base Charge
The “Base Charge” is a flat or percentage based fee that will be added to your overall shipping cost. This field can be used to cover the cost of packing materials and handling time, or to set a “minimum charge” for the table. If you do not wish to charge any additional fee, this field should be left blank.
Additional Charge Per Item
This field appears when item based shipping is being used along with the “Apply rate once per item” calculation method. It allows you to set an amount to add to the base shipping charge for each additional item in the cart after the first. For example, with a Base Charge of $5 and an Additional Charge Per Item of $1, the shipping charge for a cart containing 3 items would be ($5 + 2 x $1) = $7.
Max Charge
The Max Charge allows you to set an upper limit on the shipping cost charged to the customer. If this field is left blank no limit will be enforced.
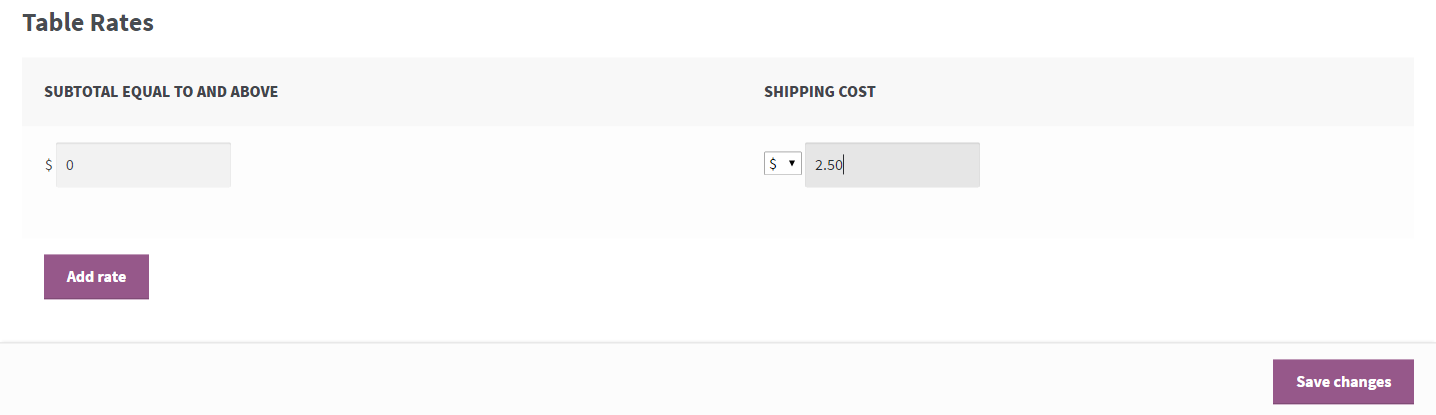
Setting Up Shipping Rates
A table can have zero or more Shipping Rates set based on a tiered variable such as item quantity or weight. The variable used is determined by the value selected for Calculate Based On.
To setup the shipping rates for a table, start by editing the table and scrolling down to Table Rates.
Adding Rates
To add a new rate:
- Click Add Rate.
- Enter a value in the Value Equal to and Above column.
- Enter a Shipping Cost. The cost can be a fixed amount, or a percentage of the value of your items in the customer’s cart.
- Repeat steps 1 to 3 as needed.
Removing Rates
To remove an existing shipping rate:
- Hover over the rate.
- Click Remove.
Thinking About Shipping Rates
When you setup your shipping rates, you need to be thinking about ranges. To illustrate, consider the table below:
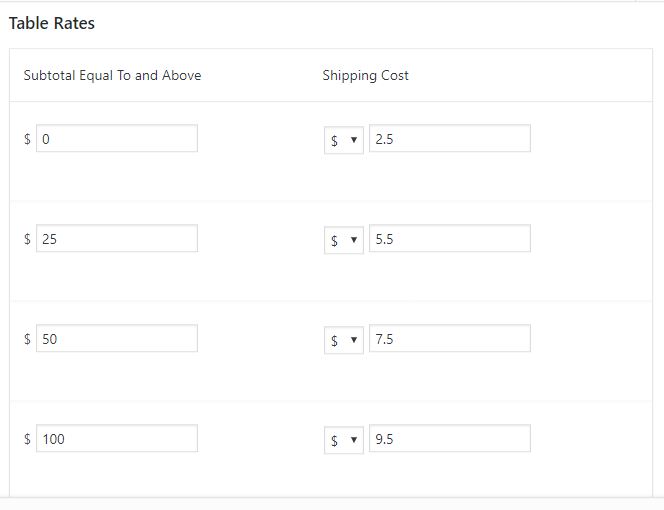
In this example, the following shipping charges will apply:
- Order totals of $0.00 – $24.99 = $2.50 shipping charge
- Order totals of $25.00 – $49.99 = $5.50 shipping charge
- Order totals of $50.00 – $99.99 = $7.50 shipping charge
- Order totals of $100+ = $9.50 shipping charge
Editing Tables
Editing a Table’s Name, Regions, or Rates
To edit an existing table:
- Hover the table.
- Click Edit.
- Make your changes.
- Click Save Changes.
Reordering Tables
You can drag-and-drop shipping tables to reorder them. The order of tables has a different meaning depending on whether the “Show One Rate Per Vendor” setting is enabled on the TRS settings page.
With “Show One Rate Per Vendor” Disabled (Default)
By default, table order is used to determine the order in which shipping rates are presented to the customer at checkout. Rates will be presented in the same order the tables appear. This…
… will translate to this on the checkout page:
With “Show One Rate Per Vendor” Enabled
In this case, the order of a table determines it’s priority: the higher a table appears in the list, the higher its priority. Higher priority tables are considered first when determining the shipping rate to apply during checkout, so order is very important.
To get the expected results you will always want to give your more specific tables higher priority, i.e. put them first in your tables list. For example, if you have a United States table that applies to the U.S. and a New York table that applies only in the state of NY, you would want to put the New York table first in your table list.
Removing Tables
To remove a table, simply hover over it and click the Remove link that appears.
Defining Product Overrides
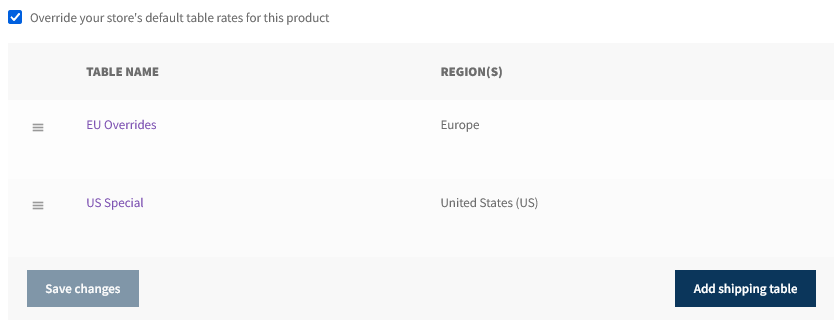
From Version 2.3 on you can override your store’s global shipping rates for a specific product. To do so, simply check “Override your store’s default table rates for this product” on the Edit Product screen and define your product level table rates in the same way described above.
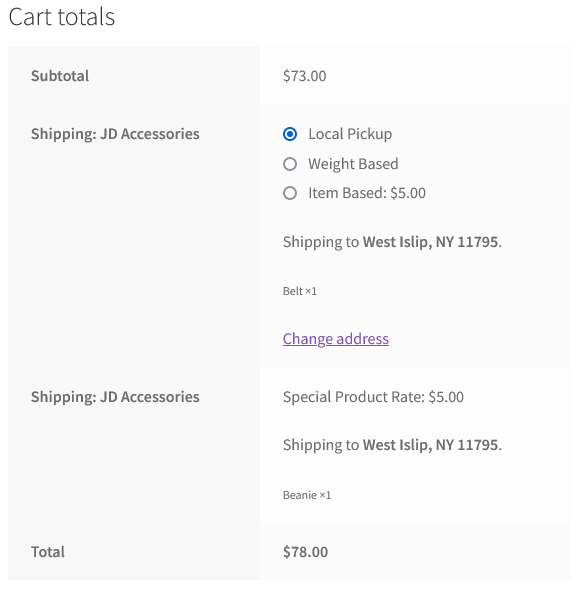
Note that any products with product level overrides will be presented to the customer on a separate shipping line on the cart and checkout pages. This is required because there’s no sensible way for TRS to merge rates matched at the product level with any rates matched at the store level for other products in the cart.
For example, in the screenshot below, the customer’s cart includes a product “Beanie” with product level overrides and another product that is using the store level rates. As you can see, “Beanie” is presented on a separate line with it’s own shipping options.
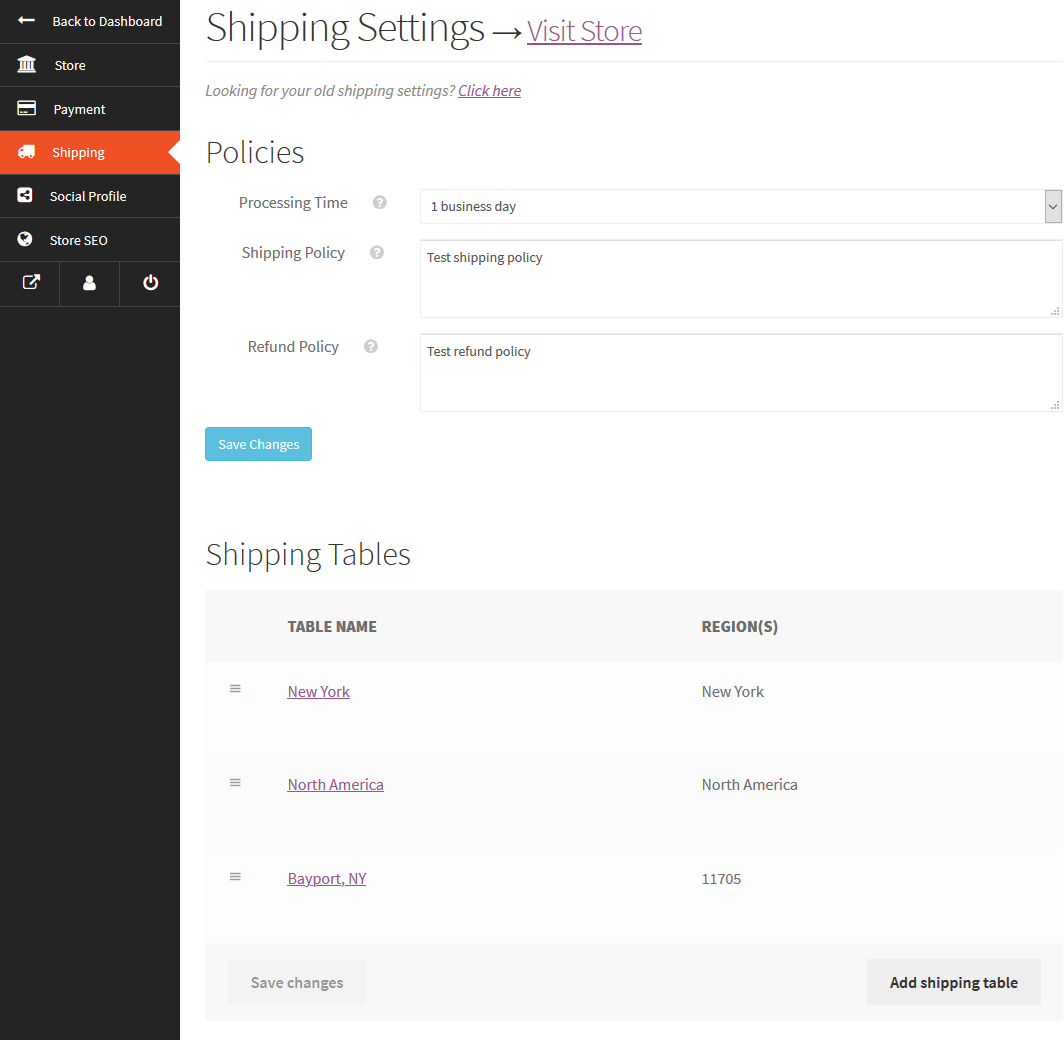
Dokan Policy Fields
Version 2.0.2 of Table Rate Shipping introduced support for Shipping Policy and Return Policy fields within the Dokan platform. We understand some users may not want these fields, and hiding them is as simple as adding the following code snippet to your functions.php file.
add_filter( 'trs_show_dokan_policy_fields', '__return_false' );