Click here to purchase Advanced Categories
Minimum Requirements
- WC Vendors 1.9.12+
- WC Vendors Pro 1.4.4+
- WooCommerce 3.0+
Installing Advanced Categories
To install Advanced Categories:
- Log into your WordPress site.
- Go to Plugins > Add New.
- At the top of the screen, click Upload Plugin.
- Select the .zip file sent to you in your Purchase Confirmation email. You have two options:
- Click Browse. Find and select the plugin .zip file.
- Drag and drop the .zip file onto the Upload Plugin screen.*
- Click Install Now.
- When the installation completes, click Activate.
* Drag and drop will only work if your browser supports it!
Activating Your License
To benefit from future updates to Payouts, you must activate your license key. To do so:
- Log into your WordPress site.
- Go to Plugins.
- Find the row for WCV Payouts.
- Click activate license.
- Enter your license key, which was delivered along with your download.
- Click Activate.
Admin Settings
Once installed and activated, you can access the settings for this plugin in two areas. The first is by going to your Plugins menu, and clicking on Settings under the WCV Advanced Categories plugin. This will automatically direct you to the Advanced Categories settings within the WC Vendors Product Form area.
The second method is by navigating to your marketplace admin area and clicking on WC Vendors > Settings > Forms > Product (WC Vendors 2.0+) or WC Vendors > Product Form (WC Vendors 1.9.14 or earlier). From there, simply scroll down until you reach the “Advanced Categories” heading.
Each of the available options is explained in more detail below.
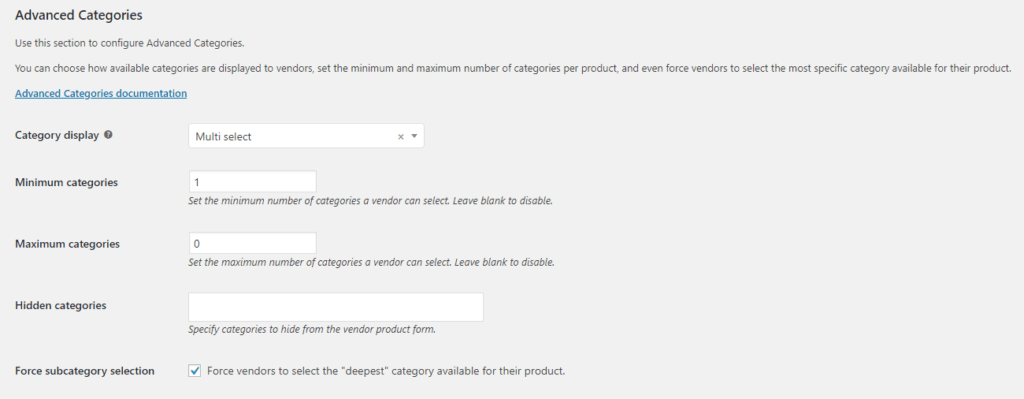
Category Display
This option determines how categories are displayed to vendors when they are entering a product. You have four options:
- None﹘The category selection will be removed from the product form.
- Multi select﹘Categories are displayed in a dropdown, with child categories slightly indented beneath the parent.
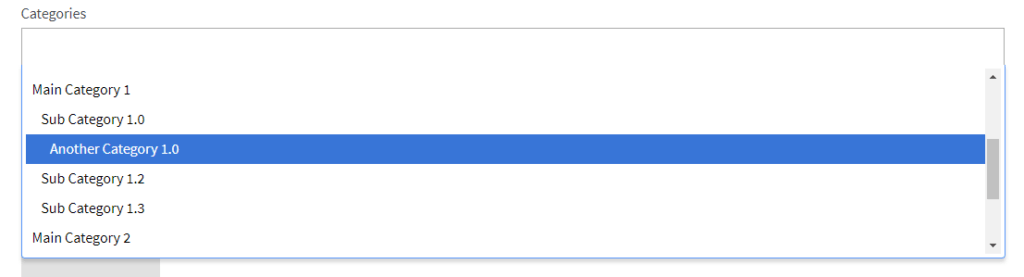
- Check list﹘Categories are displayed in a hierarchy, with child categories indented beneath their parents. Each available category has a checkbox.

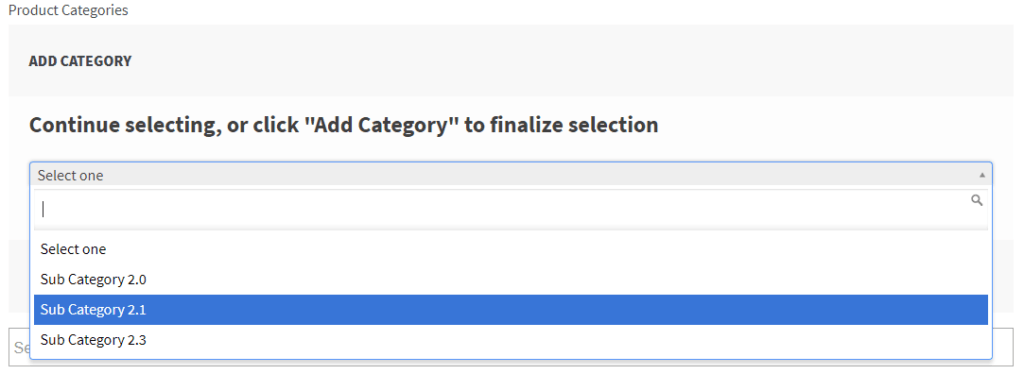
- Step down﹘The user is prompted with a drop down of all top level categories (i.e. those with no parent). They select the most appropriate category, and if the selected category has children, the user is prompted to select again.
Minimum Categories
This value will determine the minimum number of categories a vendor can place their product in. Set it to zero if no categories are required.
Maximum Categories
This value will determine the maximum number of categories a vendor can place their product in. Keep in mind that this only counts selected categories, not their ancestors.
Hidden Categories
Use this option to exclude specific categories from selection.
Force Subcategory Selection
Check this option to require vendors to select the “deepest” or most granular category available for their product. If left unchecked, vendors will be allowed to select categories with children.
Once you have these options configured, your global settings are complete!
Limiting Visible Categories
Starting with version 2.0, you can limit individual vendors to selecting descendants (children, grandchildren, and so on) of a particular parent category. To do so:
- Go to Users.
- Edit a Vendor user.
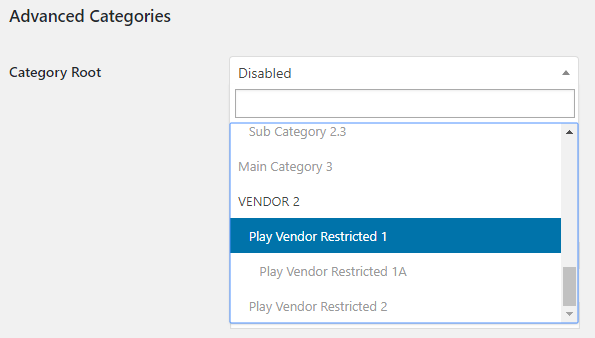
- Select a Category Root for the vendor. Choose Disabled to make all categories available to the vendor.
- Click Update User.
For instance, consider the example below. Since this vendor’s Category Root is set to “Play Vendor Restricted 1,” they will only be able to select “Play Vendor Restricted 1A” when they go to enter a product.
That’s it! In just a few seconds, you are managing your categories like a pro!